Setup guide
For Refuel to read and write data back into Snowflake, the following steps need to be followed.Step 1: Create a role and user
Run the following script as a user role that has the permissions to create a user, role, and warehouse (such as thesysadmin or securityadmin roles).
Create roles, users and permissions within Snowflake
[Optional] Step 2: Enabling Key Pair Authentication
If you want a more secure way for Refuel to communicate with Snowflake, you can enable Key Pair Authentication. For that, follow the steps here. The only change to the list of steps we recommend is to use the AES256 algorithm instead of DES3 (faster and more secure). The complete command to generate the private key isGenerate a private key
Step 3: Setup Snowflake integration in Refuel Cloud
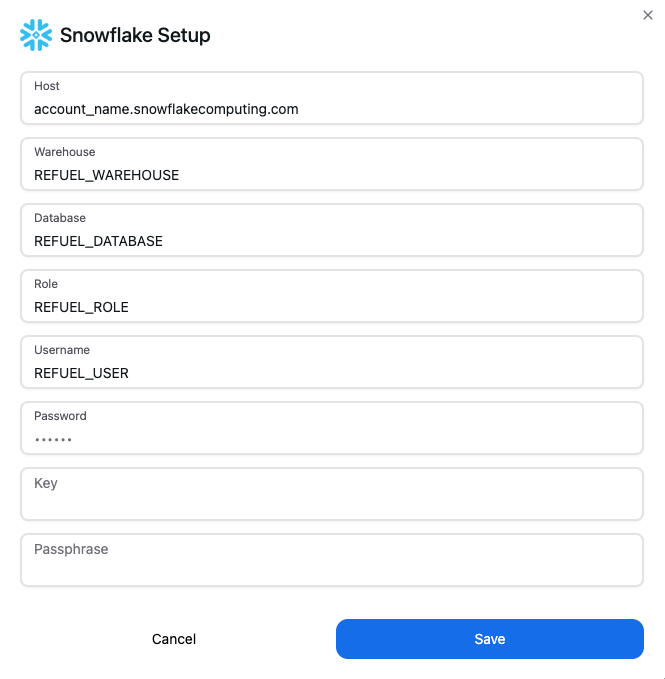
In order to setup the Snowflake integration, navigate to Integrations within Refuel Cloud Settings, select Snowflake, and fill in the following fields:- Snowflake Host (account_name.snowflakecomputing.com)
- Warehouse
- Database
- Role
- Username
- Password (If not using Key Pair authentication)
- Private Key (If using Key Pair authentication)
- Passphrase (If using Key Pair authentication)